 |
|
| Home | Marine Aquariums |
Freshwater Aquariums |
Planted Aquariums |
Brackish Systems |
Ponds,
lakes & fountains |
Turtles & Amphibians |
Aquatic Business |
Aquatic Science |
Ask the WWM Crew a Question |
| Please visit our Sponsors | ||||
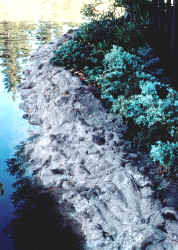
There are several approaches to repairing concrete water features. Human nature dictates that you will want to put in the least amount of time and money to achieve the desired result. There are as they say, "many roads to Rome"; this Section details the most appropriate strategies for repairing leaking concrete water effects. Water basins made of cementatious materials may leak due to cracking, wear or poor construction. These repair problems are common in our interest and their expedient repair constitutes a large market. The application of various repair technologies can best be described in order of least cost and effort versus perceived scope of job and likelihood of success. Approaches : Simplest Problem/Solution To Disaster/Salvation. 1) Individuals facing water feature repairs have several options to choose from. At the lowest end of the spectrum, they can do nothing! i.e., abandon the system or keep adding water periodically as it disappears. This may present real problems in terms of material leaching back into, poisoning the system or outside damage due to leakage. 2) If the basin/s and fall/s are intact with no visible large cracks and the structure is stable (check for adequate soil compaction and/or other support) a coating of asphalt-based emulsion (e.g. Henry's or Marvin's) or epoxy-based paint or cementatious foundation coating or repair material, may be applied in "bad" areas or more appropriately over the entire surface. The "foundation coating" technology is so prevalent and important in cementatious feature construction and repair we will give it separate treatment in the following Section. Desired surface color and texture will dictate which type of coating to use. Note: "clear" sealers and penetrants designed to treat new concrete will not work on cured concrete leaks. 3) If hairline to large cracks (more than an eight inch) are evident and the basin is otherwise stable, you can chip out the damaged spot to expose a new, clean surface and try to remedy (band-aid) the area with a patch of silicon-rubber based material, specialty hydrated calcium silicates (e.g. foundation coatings) or epoxy-based materials. The prognosis for such "repairs" is not good; at best they are temporary measures that will eventually fail. 4) For repairing the more serious "moving" and "growing" hair-line cracks, one should use an elastomeric (stretching) repair system. These are most commonly polyurethane/bitumen or chlorinated-rubber based and can be applied by brush, trowel or specialized spray equipment. These materials have a high tensile strength (elasticity) and can be applied to the questionable areas alone, or better still, over the entire basin & back of fall surface. It may be necessary and/or is strongly advised that these elastomerics in turn be coated over. Read and follow the manufacturers' instructions thoroughly. I will leave off with telling you my "horror stories" regarding "advice" from counter help and "field technicians", instead to re-emphasize that you read and follow all printed materials to the letter. 5) Situations where rocks go through the basin wall (always a disaster), large cracks, questionable compaction and obviously unstable walls call for the most drastic action. In this, the worst scenario, it may be necessary to remove all of the existing structure and start from scratch. This, of course, costs more than doing the job right the first time. However, don't despair, there may be some salvation! At this point, the failing system may be left in place and the basin considered a mere hole in the ground in which new walls, fall/s and bottom are constructed over old. One common method is to apply a cement or plaster coat over the entire basin surface. This coating consists of plastic cement, sharp sand, water and possibly a coloring agent. For added strength this method may be modified by adding a reinforcing mesh to the "new" basin. Hexagonal chicken wire in two meshes, welded wire, and for very large systems, tie-wired rebar may be called for. This is not, however, the most sure-fire method. The most-appropriate, best-available technology consists of retrofitting a liner of thick rubber or vinyl over the existing surface. For falls, a trough is constructed as a water-proof base/form and the liner is fitted over it. This is adhered to the basin liner, making a continuous water-proof membrane. The liner may be economically left as it is, but to ensure against rips and punctures, it is prudent to apply mesh and mortar over all as above. If more rock work is desired, this can be done at this time or later. This is the best method of repair in terms of guaranteed long-term leak-proofing. Pond Coating Tools & Materials Check List COATING Applicator(s) Coloring Agents Mixer Hose Nozzle Acid Trash Can Bleach Flat Shovel Pump Broom Discharge Hose Dust Pan Brush - Nylon Vacuum (Shop Vac) - Steel Extension Cord(s) Extension Pole Rags Landscape Trimming Tools Tools Chisel Account Folder Hammer Sand Paper Safety Equipment Solvent Gloves Eye Protection Boots Masks Other Considerations: Plumbing may be a primary or secondary problem in dealing with leak problems of unknown or "known" origin. It is strongly advised that all plumbing lines be pressure tested before wasting time and money on repairing the concrete (see Section on Plumbing). It may almost go without saying that the system must be absolutely clean and dry before making these repairs to ensure proper adhesion. How do you go about deciding which of these technologies applies to the situation at hand? Read the above carefully! Evaluate the source of the problem; apply the appropriate method; don't take short cuts that may not work. Your success with these different repair methods will vary proportionately with the amount of time, energy and money you are willing to invest. How to effect these repairs? By following the steps to completion, employing the tools and materials as listed, you can make this a DIY project. Don't feel comfortable tackling these repairs yourself? Contact specialists in the Aquatic Gardens Industry or concrete contractors for ready help.
|
|

|
Features: |
|
| Featured Sponsors: |