FAQs about Stands, Supports for
Aquariums: Modification
Related Articles: Aquarium Stands, Marine
Tanks, Canopies, Covers &
Lighting Fixtures, Related FAQs: Aquarium Stands 1, Aquarium Stands 2, What to Use, About
Floors Underneath, DIY, Finishing/Coating, Commercial, Leveling, Repair, & Tanks, Tanks 2,
Tanks 3, Tanks 4, Aquarium
Repair 1, Acrylic Aquarium
Repair, Used Aquarium
Gear, |
.JPG)
You
don't want to be moving the tank about...
Halimeda algae and
crustose coralline.
|
29g Biocube leveling and stand flatness
11/7/16
Greetings Crew,
Life can be crazy and I've moved 3 times and acquired a 6 month old
since I last wrote you about stocking and setting up a Caribbean Jawfish
themed tank. Things have settled down and I think we'll be at this
location at least a few years.
<Ahh>
In the interim the stand for my 29 gallon biocube had developed swelled
spots in the top around the screw holes. It was made by a 3rd party (as
opposed to oceanic or CoraLife) out of some kind of fiberboard and I did
not think the top was salvageable. So I removed it and cut a piece of
3/4 inch plywood to matching shape, painted it to match and sealed with
4 coats of polyurethane after filling over top the screw holes.
<Okay.... know that this unit likely weighs in at some three
hundred pounds... DANGEROUS should it fall>
Now while attempting to level I've observed that 3 corners of the tank
are not making good contact with the stand top. Specifically the front
right has an apparent 1.5mm gap, 2mm in front left and 1mm in rear left,
while the rear right makes good contact. I did not use a foam leveling
pad as my research seemed to show it was not indicated for this style of
tank as it appears to be fully supported by it's frame.
<I would use said foam>
I filled it to 1/3 full to see if the gaps closed up any and they
remained.
I am sure if the tank were to fail I would be confined to keeping small
Betta tanks for the rest of my life. How should I proceed from here?
<As stated and you've hinted, drain the tank and place a piece of cut
foam twixt it and this stand>
Much thanks for your input,
Keith from Charlotte, NC
<Welcome. Bob Fenner>
Re: 29g Biocube leveling and stand flatness
11/8/16
Bob,
Always thankful for your advice (both direct to me and via the countless
pages of WWM I've read). I do seem to be picking up a bit of higher than
normal concern in your reply, do you see a flaw in the direction I am
headed?
<Mmm; I do not>
I am absolutely intent on making things as safe as possible and so
have ruled out keeping toxic specimens such as Zoanthids.
<You are wise here.
Esp. some genera can probe problematical; should there
be a challenge>
I will seek out a piece of 1/4" Styrofoam before proceeding. Should that
be
sufficient to handle the poor planing I described earlier?
<Yes it should be>
On the matter of additional safety measures, I've been contemplating
looking for some sort of anchor I could use to secure the stand to a stud
from a few inches away, to add better security against tipping than just
the sheer weight of the system.
<I'm VERY much in favor of this brace/bracing>
I've already purchased a lock that I will
be adding to the cabinet to keep little hands away from chemicals,
controls
and electrical workings.
Thanks again,
Keith from Charlotte, NC
<Thank you Keith. BobF>
Composite aquarium stand issue
8/31/15
Hello,
<Deb>
I have a 75 gallon saltwater tank on a 20 year old composite (wood
board) stand.
<Mmm; hope that thing is sealed>
We have had a problem lately with the electricity going out in the area, and
that caused the tank to overflow. It has happened a couple of times. I noticed
that the trim at the bottom of the stand is starting to pull away from the
actual stand. Does the trim on a stand have any structural benefit
ordinarily?
<It does indeed. We had a similar question just yesterday... NEED to have all
the parts it's built with, and these securely fastened/glued/screwed/stapled
together. I might well be taking this tank down, inspecting, beefing up this
stand. Please read here:
http://wetwebmedia.com/aqstdcomm.htm
Thank you for your time.
Deb Walker
<Welcome. Bob Fenner>
Questionable Aquarium Stand 11/15/14
Greetings WetWebMedia Crew, I'm considering buying a 55g (long)
acrylic SeaClear complete with stand, filtration and lighting. My
concern is with the stand. It looks professionally built but on the
deck(surface aquarium
sits on) there is only a 1in X 6in wood support on each end. So the
aquarium is only supported by these two supports about a 1/8in above the
deck surface. Could there be any way this is what the manufacturer
intended?
<Yes; but... and I share your concern. Would NOT go with this stand w/o
"beefing up" the under-support... Better still, finding, or building
something more substantial>
I'm guessing the aquarium is being improperly supported and stand could
be missing some parts. Could this of damaged the integrity off this
tank?
<Oh yes; though acrylic tanks are (relative to glass) tough... too much,
variable stress can result in failure>
The tank is currently full of water, no sagging downward but I did
notice a little bowing forward.
<This is the nature of these production units period... Esp. 55's...
typically nominally 48" by 13" by 20" or so dimensionally... made
commercially with at times 1/4 (or better 3/8") material... and not
always the better quality acrylic. Though SeaClear IS a good
make/manufacturer IMO/E... having had LONG experience with the company,
their old owners>
Owner said its been like that for years.
<Again; yes>
Aside from that tank is very clean with good looking seals and
affordably priced(under $200), would you recommend buying? Thanks
Brandon
<Yes; but the comments re the stand.... And what is archived on WWM re:
MUST be strong, planar and level... and the floor underneath... capable
of bearing the weight evenly. Bob Fenner>
Should I worry about a sagging cast iron
stand? 1/31/11
I just got a new 110 gallon salt water aquarium installed. It sits on a
(standard?) cast iron stand made of what appears to be 1" steel
angle-iron with four corner legs and a lower shelf for a sump, etc. The
stand was level and flat before the tank want put on. With the tank on
it, the middle of both long horizontal supports (~4ft long) sag about
1/16 - 1/8". (I can see daylight between the lower rim of the tank
and the middle of the stand rims.) The aquarium experts who installed
it said this is common and nothing to worry about. As long as the tank
is supported on the four corners, they explain, it is fine.
<Hmm, no, it really needs to be supported across the entire
perimeter.>
I estimate the tank and its contents weigh about 1,100 lbs. It is
extraordinary to me
that glass can support so much weight, effectively held up only by its
corners. Does this sound fine to you, or is this a catastrophe waiting
to happen?
<The latter. I have seen tanks that do not even have steel going
across, that were designed to support only the corners in service over
20 years.
And others set up as you describe that fail quite quickly. It could
last, but is not proper and I would not have it in my house!>
(As you may know, emptying the tank and changing the stand is a
full-day, two-person operation.) I would appreciate any expert advice
you might have.
<A simple piece of plywood/foam can solve this for you, see:
http://www.wetwebmedia.com/aqstandfaqs.htm
and the linked files above.>
thanks
-Jon
<Welcome, Scott V.>
Question regarding the trim base on a 150
gallon tank 4/20/10
Good afternoon.
<Yawnnnnn! AM here now, sorry>
I purchased a 150 gallon tank that was in incredible condition in
November of 2008. I did not have a stand for it until this past
weekend. Yes, it sat on my garage floor for almost 1.5 years. The
silicon was still very pliable, so I didn't fear any problems.
I had the stand bad <made?> by a wood working cabinet maker. When
the tank was placed on the stand the bottom trim sat flush on both ends
of the six foot tank, but in the middle the tank was maybe 1/8 of an
inch above the stand surface. I hoped this would not be a problem.
<Mmm, could be>
I placed about 100 pounds of pea gravel and then filled the tank about
80% full. The tank is for an aquatic turtle. I had no issues that
night. The next morning I awoke with maybe 1/2 gallon of water in the
floor. It was running along the trim on the bottom of the tank and then
down onto the floor. No water was coming from anywhere higher than the
bottom trim.
<Leaks can/do originate elsewhere... just "make their way
out" at the bottom>
I drained the tank, removed the gravel and have dried the tank. The
tank is currently on the stand with shims under each corner so that it
dries completely underneath. I have inspected the tank closely, but
find no obvious leak. I did find a small hairline fracture in the
plastic bottom trim. It is near the corner on the front. It goes from
top to bottom of the 1 inch visible trim.
<Mmm, these cracks are usually not problematical. Read here:
http://wetwebmedia.com/glstkmoldng.htm
I also noticed that a few inches from that crack is another one that is
under the tank, the same thing a really hairline crack in the trim. It
doesn't appear that the two cracks are connected making for two
distinct pieces of framing, but I can't tell. The top and bottom
trims both have two middle supports running from the front to the
back.
I have done some searching today and from what I can gather these trims
do not support the tank? Is this correct?
<For the most part, yes. Are more for "holding all
together" while being assembled, "floating" the
bottom...>
Since there are girders in the middle connecting the front and back I
am assuming they do have structural support to the tank.
<Not much, no; though can be important if not supporting the bottom
about evenly all the way around>
Right now I am perplexed as to what to do.
<Likely there is a "split seam" in the Silastic somewhere
along a joint>
I am thinking that probably the silicone needs to be replaced since the
tank sat in the garage and was in temperature extremes. If I were to
simply reseal one corner, maybe a foot each direction from the corner,
would that do anything to help? I would remove the old silicone and
wipe down the glass
<With a solvent, after cleaning thoroughly w/ single edged razor
blades...
http://wetwebmedia.com/glstksilastic.htm>
before reapplying, but my question lies in the area where the old meets
the new. I really don't want to remove all of the silicone and redo
the entire tank.
<This is really the best approach... unless... do you want to try
partially filling it... let's say 50% and seeing if the leak
persists?>
My other question is in regards to the frame. Will the slight crack in
the trim on the side/visible face or the one that is on the trim that
is under the tank cause me issues?
<Not likely, but please send along photos ...>
What about the fact that the surface of the stand doesn't touch
flush to all four sides of the trim uniformly. I read about putting
Styrofoam under the tank, but that would be unsightly, though I would
do it if needed.
Thoughts?
<I would shim/support the under-surfaces of the two long/length runs
of this stand... with a piece of wood turned long end up, underneath
the current pieces... looking like a "T" from the end if you
understand, with drilling, long screws... And check the tank again for
leaks, possibly cut out, reseal>
Thank you!
Matt
<Welcome. Bob Fenner>
Re: Question regarding the trim base on a
150 gallon tank 4/20/10
Thank you for your help! Much appreciated.
<Again, welcome>
I will try to email you some photos tonight. The micro crack that is
visible on the side of the trim will be easy to photograph, but the one
on the bottom might be difficult, since my wife won't be able to
assist in lifting.
<Do take care here>
I hate removing the perfect silicon job, but I think I will have to go
that route.
<Mmm, I would wait, hold off... see if "straightening the
stand" solves this slow leak issue. Commonly does>
I will go ahead and remove all of it along the four bottom seams and
the four vertical seams. The silicon that lies between the glass
joints, will that remain when I remove the portion that is within the
tank joints?
<Yes. I would definitely NOT cut this out at this
stage/juncture>
Also, I am uncertain about the shimming of the stand. The stand is made
of hardwood (oak) and has six legs that are 3"x3". the
surface of the stand is the only portion that is plywood.
<And this is "very" securely attached to the top of the
six uprights? The lateral runners? And still there is the
aforementioned 1/8" gap? I might shim another piece of ply atop
this, and screw down through the existing... to make the top level AND
planar. Please see here: http://wetwebmedia.com/aqstands.htm
and the linked files above>
The builder didn't have a planer wide enough and we decided to just
make the top out of plywood and he trimmed it with oak.
<This is fine>
Once the tank is on the stand you don't see the plywood only the
oak trim.
We thought this would take care of any irregularities on the surface.
With a tank of that size I was unsure how to determine if the tank
bottom itself is warped.
<Highly unlikely>
I am assuming that the 'sag' in the middle is the stand.
<Yes, almost assuredly so>
Are you recommending putting shims under the middle two legs to see if
that boosts the 'sag'?
<Not the legs, but twixt another piece of ply atop the existing
one.
Doesn't need to be very thick>
I would feel much better if all four bottom edges of the tank trim were
flush with the stand,
<Yes... this is necessary>
but not sure how I go about doing it.
Matt
<Please read where you are referred, and do write back if my writing
isn't clear, complete. BobF>
Re: Question regarding the trim base on a 150 gallon tank
4/20/10
Thank you Bob!
<Welcome Matt>
I will speak to the builder and ask if he has ideas on making the top
stop sagging.
<Good>
The stand is very well made, probably weighs about 200 pounds.
Everything is mitered and jointed together. It could easily support 3-4
times the weight.
<An adequate "margin of safety">
I just need to figure out how to fix the problem without having to tear
up the stand I paid $600 for. The sag in the middle is probably less
than 1/8", but you can definitely tell it doesn't sit flush.
Would placing a small strip of cardboard under the trim along the
middle 3-4' of tank length do anything?
<Mmm, not enough>
The stand has a flat top, no border so anything placed under will be
seen.
<Perhaps adding a "decorative strip" around the front,
sides, after the leveling piece of ply is added...? B>
Re: Question regarding the trim base on a 150 gallon tank
4/21/10
Spoke to the builder and he is going to stop by
tonight. I am going to delay removing the old sealant and resealing. We
will see if we can get the top flush with the bottom of the tank and I
will fill it up again. You believe that it is possible that a leak can
be fixed in this manner?
<Yes... as I prev. stated...>
Not saying this will diagnosis my problem, but curious if a leak can be
stopped purely be adjusting the flushness of the stand surface and not
messing with the sealant.
<This is so... please see my resume, posted on WWM. I am an olde
timer in this trade, interest>
The builder said that when he attached the top (it is about 1.5"
thick) to the stand body the screws pulled the middle down slightly. He
loosened the middle screws and put a 1/16th shim between the top and
the middle of the body-length.
He thought that had created a flat surface. He used a 4ft level and
didn't notice a sag. We are hopeful that maybe when the tank
settled the stand that it created this 'sag'. He said it would
be easy to loosen the screws to see if the sag fixed itself or to add
another 1/16th" shim on top of the other.
<Ahh!>
If doing this doesn't fix our 'flushness' problem I have
another question.
Rather than attempting to put a new top on to create a perimeter
flushness what are your thoughts of inserting a 1" wide shim in
the middle of the front and back right at the center of the trim
length? This would not create a 100% perimeter flush trim, but would
create a strength point at the center of the 6ft length. Would that be
suitable or just a poor solution to the problem?
<Worth trying... but I would place a number of shims... thicker in
the mid-spaces twixt the uprights, thinner toward them...>
It would make my day if fixing the surface solves the problem. This is
my first tank great than 75 gallon and it opens up another world of
concerns regarding structure that so many don't even think about. I
thought I had all bases covered, but guess it only takes a small error
to expound greatly as the size increases.
Have a great day and thank you for all your help!
Matt
<Welcome. BobF>
Re: Question regarding the trim base on a
150 gallon tank -- 04/22/10
Update.
We attempted to create a stand surface so that the entire tank trim
would sit flush, but were unable to do so. After checking the stand
surface it appears level and flat. All that we could guess is that the
trim itself is not 100% straight. I have to wonder (I assume you would
know from your experience) that the trim is not glued on by an exact
science...even a little extra sealant on one portion could create an
uneven surface.
<Yes>
We experimented with different combinations of 1/16" and
1/32" shims between the stand top and the stand body. We attempted
to create a surface that mirrored the tank, but were unable to do
so.
<Mmm, have you "flipped the tank over" and used a six foot
or longer... or support for a smaller level, to check the levelness of
the bottom frame?>
We did make the gaps between the tank and stand smaller in thickness
and in length. I have not placed water in the tank yet. I am going to
cut some of the 1/32" shims down and place them directly under the
tank trim under the places that have the longest lateral gaps. This
will obviously cut down dramatically how much the tank could possibly
flex.
<Mmm, okay>
When we moved the tank from the stand to work on the tank I found that
water was trickling out of the empty tank from within the trim. I had
mentioned that there is a crack in the trim that is on the side
(visible face) and extends onto the bottom of the trim, under the tank.
I could press the area around the bottom crack and water would slowly
bead out. I do know now how large the 'void' airspace is within
the trim,
<About half the total volume>
but it does have a small amount of water within. I am going to attempt
to get all of that water absorbed out so it won't deter from
determining if the leak is still present.
I do worry about the crack on the bottom. The stand builder is an
engineer by trade, but doesn't have the experience with aquariums.
He asked where does the tank load apply the most pressure downwards? Is
it in the corners?
All along the bottom edge... gravity. There is some translational
torsional force in addition at the corners, but this is generally
insignificant in terms of structural integrity>
It appears to me that the load should theoretically be uniform along
the perimeter of the tank (i.e. the trim) since that is the only area
that touches the stand.
<This is so>
The girders in the middle of the tank that connect the front and back
trim are flush to the tank bottom and do NOT touch the stand surface
(by design).
<Good>
That crack just makes me feel uncomfortable since the load will be
pressing directly on it.
<Mmm... I would contact the tank manufacturer... ask their
assistance here.
Perhaps request a replacement frame, cut away the old, Silicone on the
new. If it's possible annealing the present>
As mentioned, the visible gap between the tank bottom trim and the
stand was in the center of the 6ft lateral length. After making our
adjustments we now have to flush corners (diagonal from each other) and
the center.
BUT, two diagonal corners do 'hover' maybe 1/32".
<This should be fine>
I will place the shims under those corners and fill with water in
stages over the next few days and see what happens.
I will let you know. Take care and have a great Thursday!
Matt
<And you. BobF>
Large Acrylic Aquarium Stand Question
Closing off overflows and stand modification 2/20/2010
Hello All,
<Hi Lisa.>
I have two unusual questions (I think) for you.
<OK>
I purchased a used 150 gallon acrylic aquarium that was used for
saltwater but now I am planning on using it for freshwater. I have to
build a stand from scratch since it is custom size.
<Can be a fun project.>
My dilemma...since it was used for a saltwater tank, there is the
overflow part in the back where two small and two larger holes were
drilled in the bottom for the sump/wet & dry hoses would come
through.
The guy I bought it from used PVC pipe to make his intake and output
tube to connect to.
<Typical.>
Now that I am not going to need this:
1) how can I seal these four holes so the water doesn't spill out?
I have found two end caps that screw together with a rubber seal that I
can place on the inside and then on the outside and screw it tight onto
the Plexi.
<This will work>
Someone else said to epoxy a piece of Plexi on the inside of it. I
don't want to do that in case I
do use it for saltwater down the road or I sell it to someone who wants
it for saltwater, I will never be able to get the Plexi back off.
<Exactly.>
The problem with the two end caps is that the piece on the inside of
the separate sump/overflow section is hidden but the piece that would
be on the bottom of the aquarium sticks out about 2 inches.
This would prevent it from laying flat on any stand I build.
<Easily corrected.>
So for my next question:
2) When I build my stand, I need to have a closed bottom under the
acrylic but...is it OK for me to cut out a small rectangle for the PVC
end caps I can screw together as a seal in the top of the stand that
will be under the tank.
<A small rectangle, or use a hole saw , either would work.>
I'm not sure if this will diminish the integrity of the closed top
of the stand that is to support the acrylic bottom.
<No.>
There will be a lot of weight by the time this is up and running so
from a 48" x 30" x 24" tank, the notch I will need to
cut out of the back, center will be 15" 5-1/2".
The guy at the wood shop who is helping me with dimensions didn't
think it would be an issue but you guys are the best at what you do, so
where better to ask!?
<You should be fine with this setup. If you are still concerned
about it, you could just bore holes with a hole saw for each pipe and
not have the larger rectangle, but really, either will be fine.>
Thanks for the advice,
<My pleasure.>
Lisa
<MikeV>
Re: Large Acrylic Aquarium Stand Question:
Follow up with wood\structural advice. 2/21/2010
<Hi Lisa.>
OK, great! I'm so glad to hear that it wont be an issue with
cutting out a small rectangle or circular holes for the seals. Now, why
is it important to have a bottom for an acrylic tank? Is it because it
can bow on the bottom?
<Yes.>
If that is the case, then is there a particular thickness of wood for
the top of the stand that the tank will be sitting on? 1/2",
1/4" thick and is plywood sufficient or do I need to use a solid
piece of wood, not one glued together with thin pieces, such as
plywood?
<Personally, I would use 1/2" marine grade plywood, finished to
your tastes (painted or stained.) IF you can get it, (there are a few
boatyards by me), otherwise it is too expensive. Teak works very well
also.>
Thanks again,
<My pleasure>
Lisa
<MikeV>
Stand Reinforcement
(Conversion)'¦Going From Glass to Acrylic -- 10/12/08
Sorry I forgot to put my name!! I'm Guillaume. <<No worries
Guillaume, but thank you'¦is always nice to know who we are
'talking' to>> And the title of my message was wrong: it
should have been "stand" reinforcement, not tank.
<<Duly noted and corrected>> Hi Everyone!
<<Greetings!>> I really love your site: so informative!
<<We are happy you think so>> However I didn't find a
specific answer for my issue; perhaps you can help me. <<I shall
try>> Just bought a used bow tank 46g with a basic stand in pine
wood. I wanted to upgrade my 15 gal tank for my goldfish. <<Very
good...these fish really do require more space than most folks
realize>> Because I didn't realize it would be so big in my
bedroom - and because I'm a bit nervous as some of the seam starts
to peel off a bit (the tank is six years old)- <<Mmm,
yes'¦the seams 'peeling' is not a worrisome sign. This
tank may well be unsafe to use. At the least, I would fill this tank
with water (outside the house) and let it stand for a few days to see
what develops>> I'd like to get an acrylic 36 gal aquarium
instead. <<A good idea I think>> But I wanted to keep the
stand (I repainted it). <<Okay>> Because the stand
doesn't have any platform, (it's empty in the middle, a bit
like a crown) <<Yes, a typical 'glass' tank stand
supported around the perimeter of the tank>> is it safe to put a
board over it? And if so, what material should I use and what
thickness? <<Although this stand is not 'made' for this
tank, considering this volume of water, and as long as the stand is
larger than the perimeter of the new 36g tank by no more than a couple
inches on all sides then yes, you can make do with the existing stand.
I recommend you use a DOUBLE layer of ¾' plywood cut to
fit on top of the stand to support the new 36g acrylic tank. And though
not a 'necessity,' I also recommend a piece of
¼' Styrofoam atop that for some additional
cushion>> As the stand was originally built for a glass bow tank,
I presume only the four corners are strong enough, right? <<The
stand itself is strong to support the weight of the smaller tank as
long as the top you add is strong enough to support this weight>>
And should the board be attached or nailed to the frame? (I'm not
an expert with tools!!) Thanks! Guillaume <<Permanent attachment
is not necessary'¦simply rest the plywood panels atop the
stand and place/center the tank on top of these. The weight of the
water will hold all in place. Regards, EricR>>
Re: Stand Reinforcement
(Conversion)'¦Changing From Glass to Acrylic --
10/13/08 Thank you Eric R. for replying to my message!
<<Quite welcome Guillaume>> Your expertise is really
awesome and very much appreciated! <<I'm happy to
assist>> Just one more question: <<Okay>> Instead of
getting a Bow 36 gal acrylic, (which is 30''L x 15"W x
21''H), should I get a rectangular acrylic 30 gal that is
36'' L x 12"W x 18''H (since the stand was made
for a bow 46 gal that was 36'' long)? <<If this is more
appealing to you then, sure>> Would it be better for the
stability or worse? <<Shouldn't make a difference in this
situation>> It seems the two lateral sides of the stand are
really holding the weight... <<The double layer of
¾' plywood we discussed will spread this burden over the
entire structure'¦no worries>> And is it better for
goldfish to have a longer tank versus a higher one? <<Maximizing
surface area for gas exchange is desirous, yes'¦but the
difference between these two tanks is nominal (assuming the 15'
dimension on the bow tank is its 'widest' point). I say choose
whichever of these tanks is the most to your liking>> Thanks
again! <<Welcome>> (I'm so glad I found that site!)
<<We are too!>> Guillaume <<EricR>>
|
R2: Stand Reinforcement
(Conversion)'¦Changing From Glass to Acrylic --
10/13/08 Thanks again EricR! <<Always welcome
Guillaume>> The 36 Bow Tank looks obviously nicer...
<<Okay>> My only concern is that the double layer of
plywood (I only found double 1") <<For safety sake I
need you to be more detailed/specific here'¦what do you
mean by this exactly? Are you are using two layers of 1'
plywood? Or are you using two layers of ½'
plywood? If it is the latter'¦this can work as long as
you bond (glue) the two sheets to make them as one (doing so
increases the strength of the stacked panels). actually only
touches the two lateral sides. <<This will not do
Guillaume'¦the plywood needs to be supported around its
entire perimeter>> There is a small space all around. (the
plywood doesn't touch the front "bow" part of the
wood frame, nor the back side.) It still feels very stable.
<<Perhaps I did not explain in enough detail
before'¦ The plywood sheets need to be large enough to
completely cover and rest atop all four sides of the stand else
the plywood will bow under the weight of the filled aquarium. If
space is not an issue, you can cut the plywood (or have it cut)
to the width of the widest part of the stand without having to
follow the 'bow'>> But should I compensate with
Styrofoam all around? <<Not a necessity as stated, but it
will provide some cushion to the bottom of the tank and will
allow for 'very slight' variations in the surface of the
plywood>> (sorry for all these questions! just want to be
sure!) Guillaume <<No worries'¦I want you to be
sure too! Eric Russell>>
R3: Stand Reinforcement
(Conversion)'¦Changing From Glass to Acrylic --
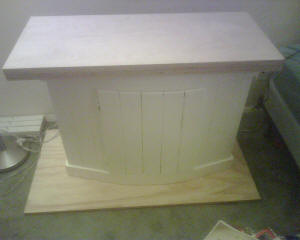
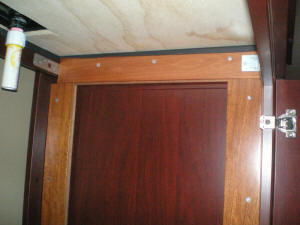
10/14/08 I'm sorry Eric for the confusion. My
English is not always good! <<No worries my friend... Your
English is actually quite good'¦I just want to be sure I
understand what you are doing to ensure my advice is
accurate>> Let me explain with more details (I also took
pictures): <<Excellent>> I found two 1''
plywood boards (1" each) that I placed on top of each other
(together they are 2") covering my stand. (pics 1 and 2)
<<I see these'¦ If these are true
'laminated-ply' boards then one is probably strong enough
for what you have planned. But'¦ If these are
'composite particle' boards as they look to me in the
photo then I would use the pair of them as you have them
shown>> These plywood boards are slightly larger than the
frame, which means that viewed from the top, you won't see
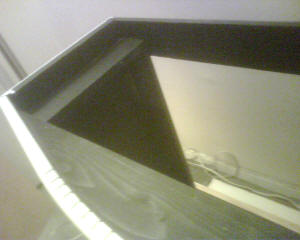
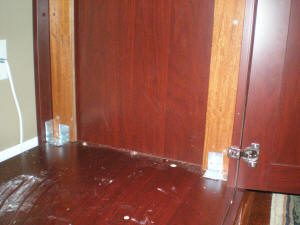
the stand. <<Ah, very good then>> However, the way my
stand was built, the two collateral sides are slightly higher
than the rest of the frame. (I'm not sure why, if it was to
prevent the 46 gal tank from moving...). <<Hmm, maybe
so'¦ What you can do is to use the boards as you show in
the picture and 'shim' the gaps to provide total
perimeter support>> I remember that on glass tanks, the
bottom panel is usually not touching the floor because of the
frame. <<Yes>> So I assume those two higher lateral
boards were touching the bottom of the glass tank transversally.
<<You wouldn't want those pressure points on the glass
itself'¦and probably not the case if the stand was made
for a particular tank, but would depend on the height of the
uprights versus the thickness of the frame >> That is why
the two plywood boards are currently held mainly by these two
side boards, leaving a small ¼ " space all around
beneath. <<I see this'¦ While the end panels are
the primary structural members, laying the plywood panels across
these and placing a few wood shims along the front and back rails
should be enough with those beefy panels and for the smaller 36g
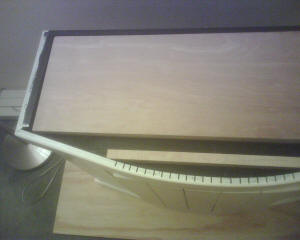
tank you have planned>> In addition, there are two small
lower horizontal panels on each side, inside, near the top as
well as another one on the bow side. (pic 3)
<<Yes'¦these 'stretchers' are the rails
where you would add the shims>> I started to put some
plywood boards there too in order to reach the level of the two
higher sides. Not sure if this is the best idea....(pic 4)
<<If you can match the height of the vertical end panels,
essentially 'filling-in' the top and bringing it all to
level, and then lay the larger panels atop this, then
yes'¦this is a very good approach>> Let me know if
my descriptions make any sense. <<It does!>> Once
again I appreciate greatly your help! Guillaume <<It is my
pleasure to assist. EricR>>
|
 |
|
R4: Stand Reinforcement
(Conversion)'¦Changing From Glass to Acrylic --
10/14/08 Thanks a lot for your help Eric!! Guillaume
<<Has been my pleasure Guillaume. Good luck with your
project. Eric Russell>>
|
Adding support to stand 8/19/08 Hello all.
<Chris> I recently purchased a 200 gallon aquarium and have been
doing some slight changes to the stand and canopy. By that I mean all I
have done thus far is paint and seal it. <Can be a pain, but
worthwhile!> After doing some research however, I am a bit nervous
to fill it seeing as how there are no braces to speak of in the stand
to support the weight that this aquarium will have. <Oh? Is this a
commercially made stand?> I purchased the aquarium from an
acquaintance at my LFS and I did see it fully up and running before I
bought it so I know that it can support the weight, but for my peace of
mind I would like to add some real supports in there.
<Understood.> Just so you are aware it looks to be just 4 sides
and a top and bottom. <Typical construction, actually stronger than
it looks.> Seeing as how the stand is already built, I would need to
build the support inside. My question is, in order to get a snug fit I
will need to screw some, actually many of the pieces together through
the existing stand. Will this affect the stand in any way that could be
detrimental to its stability? <No, your stand sounds like it
functions on the compressive strength of the wood as is. If it relied
on long support beams, drilling too many holes could be a concern, even
then very little unless way too numerous.> Also, in order to fit the
long beams into the stand I will need to cut them in half, then put
them back together with some sort of connecting piece, I know cutting
the wood in half will weaken it tremendously but would it still be
worth doing? <It is really hard to say if this is worth doing
without seeing the stand, likely not in my book. That being said, if
you do wish to help this stand out, I would provide a vertical support
under the point at which these two pieces of beam meet.> Thanks for
your help. Chris <Welcome, Scott V.>
| Stand Modification 3/29/08 Scott I have the
pictures. What do you think? <Looks good, it will be fine. You
did a nice job with this.> Remember the cabinet used to be
6' long, now being 4'long it has new vertical and
horizontal support, steel corner brackets, heavy duty screws
,ply-wood under tank screwed down. <All is good here, Scott
V.> |
|
|
Need help with a tank stand--can't tighten bottom
bulkheads due to wood center brace 6/20/07 Hi there, I'm
hoping you can help me. I have a Perfecto 150-gallon glass aquarium
whose dimensions are: 48" long, 24" wide and 30" tall.
The tank has plastic center braces on the top and bottom. The stand for
the tank is wood and supports it fully around all edges; the top is
fully open but with a wood center brace running vertically through the
center. Recently I had the tank sent out to an aquarium company to have
the glass bottom drilled for two bulkheads along with an internal
overflow box installed. I just got the tank back today, and they did a
beautiful job. However, when the tank was set back on its stand, the
wood center brace on the stand was too wide to allow me to fully
tighten the bulkheads underneath. <Doh!> I asked the company who
did the work what I could do to rectify this--they said I could notch a
cutout in either side of the wood center brace to accommodate the
bulkhead fittings. <Mmmm> However, I'm worried that this will
compromise the integrity of the stand-- <Yes> I don't want it
collapsing and spilling 150 gallons of water on the floor. Could you
guys help me out as to what I should do--should I consult with an
engineer first or is it okay to do this modification? Any advice would
be greatly appreciated. Thank you. <Well... likely a
"thinner" nut can be found... or the through-hull/bulkhead
fitting reversed (with the throat up, perhaps shaved, cut down...) and
an extra gasket found for both sides... and a smear of Silastic on both
sides... that will do here... Perhaps with some shaving of the wood
twixt the tank and stand to accommodate... If push comes to proverbial
shove, you might need to consider adhering the (likely PVC) fitting
directly onto the tanks glass... and dedicating yourself to never
jarring it... Otherwise, the worst... giving up on the present holes,
sealing over them (with glass panel/s and Silastic) and having the tank
re-drilled. I agree with your NOT cutting through the manufactured
stand support... UNLESS you feel comfortable (YOU!) with replacing this
support (and losing the manufacturer's warrantee) with two new
ones, placed on either side... Which is really what I'd do...
Cheers, BobF>
Re: Need help with a tank stand--can't tighten
bottom bulkheads due to wood center brace 6/21/07 Wow!
Thanks so much, Bob, for your kind reply!! I really loved your book, by
the way; it really helped me get started with my tank! Plus I've
learned so much by reading through all the articles and FAQ's from
WetWeb Media; you guys are great! I think I've come up with a plan
for my stand. I'd really rather not mess around with the bulkheads;
I only really need to notch the wood 1/4" on either side, but
leave the center brace in place, and I think I'll place two new
boards on either side, like you advised. I really don't want to
have the tank re-drilled: it took the company forever to get the work
done; I'd consider getting a new stand before doing that. Anyway,
thank you so much, Bob, you've really helped me out! <Ah, good!
Cheers, BobF>
Sump and Return Pump, and Stand Questions -
02/09/2007 Dear WWM Crew, <Scott>
First, thanks for establishing this informative
forum. It has been extremely helpful and I am a frequent
visitor. I conducted some research but didn't find a
good response to the question I have. I have a 180 gallon
acrylic aquarium. Prior to receiving the aquarium as a
surprise gift from my lovely wife, I had purchased a 180 gallon
All-Glass stand. I know that an acrylic tank must have
support across the entire bottom of the tank. If I were to
place a 3/4" - 1" piece of plywood on top of the entire
stand, would this be enough support for the tank or do you have
additional recommendations? <This thickness plywood should be
fine... I would go ahead and fasten it (with screws... brass or
stainless would be best... and coat over these...) to the outside edges
(every six inches or so) to give added strength to the
"inside" of the support> I could attempt to sell the
All-Glass stand, if necessary. Also, while I was conducting
research on return pumps, additional concerns came to
mind. The acrylic tank has a 16" X 5" overflow in
the center. The sump I have ordered from the LFS has arrived
and it has two return holes drilled on the end of the
tank. In hindsight, perhaps I should have had the holes
drilled in the center side of the sump versus the ends. Your
thoughts? <Mmm, not a big deal... I'd use the one on hand with
the through puts on the end> The overflow has (2) 1 1/2" dual
drains and (2) 3/4" returns. I was planning on
purchasing a Iwaki 70RLT (1500 gph @ 4' Head) or 100RLT (2000 gph @
4' Head). Iwaki seems to be the pump of choice in
Michael Paletta's "Ultimate Marine Aquariums". <Is a
good product line... amongst a few... though there are some quieter>
Anyway, in determining what the return rate of the pump should be,
I'm not sure how many gallons of water will drain out of the tank,
and as such what the rate of my return pump should be. Also,
I was contemplating using 2 pumps instead of one, but believe that I
would be better off with the one pump (with a 2nd as an emergency
back-up). <I agree> Now, for my sump, it is 60
gallons with a refugium in the center. I probably should
have planned this out a bit better because of the overflow being in the
center. I know it is best to have the overflows drain into
the first compartment which houses the skimmer. Would you
recommend that I route the drain water to the first compartment with
PVC? <Yes> Should I connect both drains using a "T"
connector or just have each of them continue to drain separately. <I
would have drain separately... a bit more flow, not as much noise from
the separate fall...> An additional concern I have is that I will
have to use additional PVC to route the returns from the pump (housed
on the end of the sump) to the center, which I'm sure will affect
the amount of water that is being returned. <Yes, but not much>
I was planning on turning the water over 10X+ times/hour,
but I'm not sure how feasible this is with my current
set-up. Have you ever known anyone to have the sump drilled
in the center side a
nd have the return pump housed there? <Oh
yes> If you feel it necessary to modify the sump, please let me
know. There aren't many quality resources in Tucson for
me to turn to. I sincerely apologize for the lengthy
email, but I know that you have the resources and expertise necessary
to provide good advice. Thanking you in
advance. Scott <Well...
the principal concern I have is the rate of flow of water to/through
the refugium portion... I would devise your plumbing to have this
reduced considerably, by bypass. Bob Fenner>
Stand
integrity, Hole cut-outs around and tightening of bulkheads 7/23/05
Hi guys, and thanks for all of the great advice so far. <Hi Randy,
Ali here> I am ready to cut the top of my diy tank stand to
accommodate the bulkheads from my tank. I have some
questions about how much room I'll need around the
bulkheads. Here is a picture of the bulkhead nuts sitting on
top of the stand http://home.cfl.rr.com/homebrewed/fish/180-039.jpg
. The stand top is about 1" of plywood, then there will
also be a 3/4" layer of Styrofoam under the tank, so the bulkhead
nuts will be stuck way up inside the part I cut out. Can you
picture what I'm talking about? <I think so...> I was
planning to start with at least 1" of clearance around the
bulkhead nuts. <1 or 2" of clearance would be fine, I doubt
cutting the top of the stand to create a 2" of clearance would
hurt the integrity of the stand. Additionally, it sounds as if you have
a frameless (Lee-Mar style) tank, if this is the case then as long as
the tank is fully supported on the corners, then the bulkhead cut-outs
won't matter as much, go ahead and start cutting :)
> But do I need to get some type of tool on the nuts to
tighten them down? I don't think I'll be able to
hand tighten them very easily since they'll be surrounded by
plywood. <No tools necessary, good ol' fashion hand-tightening
them would be fine. Even if it's just using the tips of your
fingers to tighten them, drink some Gatorade and flex your muscles -
YOU CAN DO IT!> Just make sure the I don't want to cut out any
more material than required, since I'm concerned about the tank top
bowing in the area around the cutout. <As long as the tank is
properly braced at the top, bowing shouldn't be a real concern>
Thanks!! Randy <No prob, good luck Randy. - Ali>
Iron stand footprint vs. tanks 8/15/05 Bob - I have an iron
stand that is designed for supporting 2 125 g tanks -
72X18". I have two 75 gallon tanks -
48X18". I plan on placing 3/4" plywood/pressed
board between the stand frame and tanks. Is this a concern
with the difference in length between the small tank and longer
stand? Is there a way to compensate? Thanks in
advance Scott <Mmm, have seen metal stands where this
would not be a problem, and ones where it definitely would... are there
supports only at the four corners of this stand? If so, I'm given
to suggest NOT using it with shorter tanks. There is likely a
possibility of strengthening the unit however (in any case) with
welding or drilling and adding metal to make the areas where the tanks
seat more immobile... along with the wood (which I'd waterproof)
being placed on top in turn. I would bring the stand down to a
weld-shop for their inspection... mention the weight (about ten pounds
per gallon finished) of the tanks to be placed on it... ask the folks
there what they would do. Bob Fenner>
AGA pine stand and refugium 10/25/05 Hello there,
<Howdy> Thank you for all the great info I have found on your
site. I have a few questions regarding a 90 gallon AGA pre -drilled and
AGA 48" x 18" pine stand. The door openings on the pine
stand are too small to fit a nice sized refugium in. <May want to
locate to the side, above...> If I were to remove the center brace,
install a refugium then replace the brace, would I be asking for
trouble in the future? <Mmm, not if done well> What would be
better to use, glass, acrylic, or Rubbermaid? <Define better...
overall, the acrylic is best IMO/E... as it allows you to see inside
(good for manipulation), cut and fit plumbing easily, doesn't break
as easily as glass... and if important, is a good/better thermal
insulator> I can purchase an acrylic refugium which would be
easiest, I can make a 30 gallon glass refugium. I have no clue on how
to use Rubbermaid containers, could you elaborate more on this?
<Mmm, is hinted at in places... re sumps, refugium designs on WWM.
Would be nice to have spec.s, graphics re though. Cheers, Bob
Fenner>
Drill one round hole in Oceanic bowfront aquarium
stand - 01/12/2006 I've searched for an exact answer to
this question. I have found counsel not to drill holes in
the supports for an aquarium stand and counsel that it would probably
be OK to drill round holes through a center dividing wall that is also
a support in a stand, but not near the edge. <Likely so... though
will definitely void any warranty> My question concerns
drilling through the side wall of the stand. <Mmm, I would
"beef up" the vertical supports (internally, with one or two
by planks... screw into the existing...> I have an Oceanic 72G
bowfront aquarium with an Oceanic stand. There is no room
underneath the aquarium for my new Ecosystems refugium. The
Tidepool II sump takes up more than half the space and the refugium
requires 36". I can put the refugium on its own stand
to the side of the aquarium. <This will do... or above...> I am
using vinyl hose for the return from the refugium to the sump and would
like to go the direct route - through the side of the Oceanic
stand. That would require drilling a hole about 2" in
diameter. It would go in the center of the side wall, about
10"-12" up from the floor. Would this be safe?
<Likely so> The alternative is a crooked route down, back, and
around the stand, and then bent into the sump - all reducing GPH and
unsightly, plus far more likely to get kinked or even dislodged from
the sump. Richard C. ROCKWELL <Do add the other wood supports, drill
for the through-put and don't worry. Bob Fenner>
Re: Drill
one round hole in Oceanic bowfront aquarium stand -
01/12/2006 Thanks very much. I shall add those internal wood
supports. On one of your pages, you say that one can never
have enough space underneath the aquarium. So true! <Heeee! Or too
large a hard drive, savings account...!> That alone is a reason for
buying an aquarium larger than 72G. At the time, 72G seemed
huge. <As did candy bars... sigh... BobF>
AquaC Skimmer
Selection/Stand Modification - 08/05/06 WWM Crew,
<<Scott>> I am going to be setting up a 180 gallon acrylic
reef system with LPS corals in the near future. <<Neat!>> I
currently have an All-Glass stand (24" tall), but don't have
the tank yet. I have recently been told that since I am
setting up an acrylic system (this will be my first), that acrylic
tanks need support for the entire tank and I will need to attach a
sheet of plywood to the top of the stand (no problem). Is
this true? <<That is correct, and keep in mind this is all that
will be supporting the tank in the center of the stand...I suggest a
"minimum" thickness of 3/4". And since I like
my tanks a bit higher than "standard" tank stand height
anyway, I would even consider two layers of plywood>> Now for the
skimmer, I recently read your skimmer articles (thanks...they were
extremely helpful) and it appears as though you have nothing but good
things to say about the AquaC line of skimmers and that their customer
service is 2nd to none. <<Indeed, have spoken with the
owner/President (Jason Kim) on occasion...an extremely nice/helpful
fella. There are other great skimmer brands out there
(Euro-Reef is my current fave), but I think you'll be quite happy
with AquaC>> The EV 180 is rated to 200 gallons and the EV 240 is
rated to 350 gallons (of course you already know
this). Since my stand is 24" tall and the 240 is
26" tall, would the 180 run the tank efficiently or would I be
better off somehow modifying the stand (any suggestions) to accompany
the 240 (not sure how much additional space I would need to remove the
collection cup). <<Well Scott, as I recall, Jason's design
allows you to remove the skimmer cup with as little as 1/4"
clearance, but that still won't allow you to put the 240 in your
current stand. If I were to have a look at your stand/had a
detailed description I could recommend a way to increase the height (if
possible), but otherwise I'm reluctant to make
suggestions. As for the EV-180 servicing your system, yes, I
think it would unless you plan to stock very heavily in which case a
larger/different brand that fits the stand might serve better>>
Thanking you in advance for your feedback and keep up the great
work. This is a great forum. <<Thank you for the kind
words'¦for writing so well>> Scott
<<Regards, EricR>>
Lining around inside of stand?
11/4/06 Hello crew and thank you up front. <Welcome> I would
like to put some sort of waterproof lining/trap/container/dike in the
bottom of my tank stand to contain minor water spills, leaks, etc.
<Have seen a few designs for these> Like for changing pumps,
plumbing and the like. Something that could have a 2,3 or 4"
perimeter to contain the water. My sump and return pump would set
inside it. It would cover the entire bottom area of the stand. Any
recommendations on what I could use to construct this safety dike?
Maybe something that could be folded/bent along the edges to create the
3-4" high perimeter? Or maybe something solid set
inside the stand? I posed this question on ReefCentral, but no replies
yet. Many thanks for your time, Peter <I would try to fashion, or
have made, something "matching" or agreeable with the
surrounding area... to go around the existing stand/bottom area, and
fit a piece of liner of good thickness... 30-40 mil... EPDM, Butyl
Rubber, sandwiched pond material about the edge inside... mount all
this below, under the tank and present stand. Bob Fenner>
- Getting a Larger Tank Stand - Dear Crew: <Hello, JasonC
here...> Can I buy a bigger stand for my 55 gallon tank, currently
48x13? I would like to get the stand meant for a 75/90
gallon, which is about 5" deeper. To spread the weight
I would attach 3/4" or 1" plywood over entire surface and lay
my 55 on that. <This would work, but to make certain the platform is
stable I would brace underneath with pieces of 2x4 and use the 1"
plywood. Still the thought of this makes me nervous - I would try and
test the set-up first before committing to this design.> This is
mainly to get a bigger interior so I can buy a decent size standard
sump without breaking the bank. I mean, I could buy the
stand for less than the price of a custom made sump to squeeze into my
55 gallon stand (10 1/2"). <Makes sense.> This, or course,
would also allow me to get a bigger sump. Thank you for your
time. Chris <Cheers, J -- >
Oceanic tank, actually stand, modification Hello Bob, Maybe
you can help me? <Perhaps. Will try> I have an Oceanic stand for
a 180g tank 72"x24". My skimmer is inch too tall to fit in
it. <Under it> I noticed that the floor of the stand is solid
(1.5" thick), if I cut out a roughly 40" x 18" rectangle
<Don't do this> to set the sump down right on the floor then
the skimmer, while in the sump, will fit beneath. Do you think that
removing that much of the flooring (staying at least 2" inches
from the back wall of the cabinet) will compromise its strength to hold
the tank? any thoughts would be helpful. as always thank
you for your help Stephen <I do think this is too much of a risk,
would not do it. Look for a shorter skimmer... perhaps an Aqua-C
unit... much better than compromising the stand structure. Bob
Fenner>


.jpeg)
.jpeg)
.jpeg)
.jpeg)
.jpeg)